How to Make a Highlight Video: A 2026 Viral Guide
DailyShorts AI
You’ve got a long recording, a folder full of clips, or a game’s worth of footage sitting on your drive. You know there’s good material in there. The problem isn’t quality. It’s speed. Most creators get stuck because they treat highlight editing like a scavenger hunt instead of a selection system.
That’s why most highlight videos underperform. They open too slowly, pile on random “best moments,” and feel like leftovers from a longer piece instead of a standalone asset built for TikTok, Shorts, or Reels.
If you want to learn how to make a highlight video that captures attention, you need a different mindset. Think less like an editor polishing a recap and more like a short-form strategist building a clip that can survive the scroll, hold attention, and drive the next action.
Crafting Your Narrative and Sourcing Golden Clips
A strong highlight video starts before editing. The two things that matter first are the narrative and the source clips. If either is weak, the final cut feels disposable.
Most creators still follow outdated advice: grab the best moments, stack them together, add music, export. That can work for a recap reel, but it usually fails on vertical platforms because attention is tighter and context disappears faster. As noted in Stack Athlete’s breakdown of highlight video gaps↗, most resources focus on showing context and placing the best moments first, but they don’t address how narrative pacing, emotional hooks, and cut rhythm should evolve for short-form viewing.

Start with one sentence
Before you choose a single clip, write one sentence that answers this: what should the viewer feel or understand by the end?
That sentence becomes your filter. Without it, everything starts to look “good enough,” and your highlight turns into a cluttered montage.
A few examples:
- For a podcast clip: “This segment proves why most creators waste time on the wrong platform.”
- For a sports reel: “This player controls the game through anticipation, not just raw speed.”
- For a webinar cutdown: “This moment shows the one mistake that keeps teams from converting attention into sales.”
- For an event recap: “The event felt fast, crowded, and worth attending next time.”
Those are not scripts. They’re decision tools.
Practical rule: If a clip doesn’t strengthen that one sentence, it doesn’t belong in the cut.
Build a beginning, middle, and end
Even a short highlight needs movement. Not a full plot. Just progression.
A simple structure works:
- Open on tension or payoff
- Add just enough context
- Land on a conclusion, reaction, or takeaway
That’s what separates a memorable short from a random compilation. The viewer feels guided rather than dumped into fragments.
If you want a good visual reference for how editors create flow between disconnected shots, Clipping Pro's montage tips↗ are useful because they focus on cohesion rather than just flashy cuts.
Find golden clips without manual scrubbing
Manual review is still the slowest part of highlight production. It also leads to biased picks. Creators tend to choose clips they remember making, not clips audiences cared about.
That’s why Most Replayed Data, or MRD, matters. Research on YouTube highlight detection using Most Replayed Data↗ shows that the most engaging moments can receive up to 10 to 20 times more replays than average sections of long videos, and highlight videos built from those moments can improve retention by 30 to 50%. That’s a practical signal. Replays tell you where attention naturally pooled.
If your source is a long YouTube video, transcript search plus replay behavior is a smarter combo than intuition alone. This is also why workflows built around tools, transcripts, and replay signals consistently beat “watch everything and hope you spot the good parts.” If you’re pulling from existing uploads, this guide on getting clips from YouTube videos↗ is a useful companion process.
What a usable clip actually looks like
Not every exciting moment is a usable highlight. A usable clip has to stand on its own.
Look for material with at least one of these traits:
- Self-contained meaning: The viewer can understand the moment without needing five minutes of setup.
- Emotional spike: Laughter, shock, urgency, relief, frustration, or celebration.
- Specificity: Strong claims, sharp phrasing, visible action, clear reaction.
- Contrast: Before and after, mistake and correction, doubt and payoff.
- Clean visual focus: One speaker, one action, one key subject.
A weak source clip often has one of two problems. It either needs too much context, or it contains too many ideas at once.
The best highlight clip isn’t the most impressive isolated moment. It’s the moment that still works after compression.
A fast selection filter
When reviewing candidate clips, ask four questions:
| Question | Keep it if... | Cut it if... |
|---|---|---|
| Does it open strong? | The moment starts with tension, action, or a sharp line | It needs a long setup |
| Can it stand alone? | The viewer gets the point fast | It depends on missing context |
| Does it match the narrative? | It reinforces the one-sentence angle | It’s good, but off-theme |
| Will it crop well vertically? | One subject or clear focal area | Important action sits too wide |
Use that filter and your editing gets faster because fewer clips survive into the timeline. That’s the point. Strong selection is what makes rapid production possible.
Scripting a Hook That Stops the Scroll
A weak hook kills the entire highlight before the edit gets a chance to work. On short-form platforms, the first line and first frame carry most of the burden. If they feel generic, the viewer leaves.
That isn’t just a social media problem. In recruiting footage, coaches often decide whether to keep watching within the first 30 to 60 seconds, and placing the strongest highlights first can drive 70 to 80% higher review completion rates, according to NCSA’s highlight video guidance↗. The principle is the same on TikTok and Shorts. Front-load the value.
What most hooks get wrong
Most bad hooks fall into one of these patterns:
- They start with context instead of payoff
- They sound like an introduction
- They hide the strongest line too deep
- They tell the viewer what the clip is, instead of why it matters
If your opening sounds like “Today I want to talk about...” or “Here’s a quick highlight from...”, you’ve already lost momentum.
For a deeper look at why some openings trigger curiosity and others die instantly, mastering hooks for social content↗ is worth reading.
Four hook formulas that actually work
Use these as frameworks, not templates you paste blindly. Match the hook style to the clip’s real payoff.
The result-first hook
Lead with the outcome before the explanation.
Before: “We tested a new content strategy last month.”
After: “This one change made our content easier to scale.”
Best for educational clips, marketing breakdowns, and business commentary. It works because the viewer immediately knows there’s a useful takeaway.
The contradiction hook
Open with an idea that clashes with common advice.
Before: “Here are some tips for growing on short-form platforms.”
After: “The best-performing clips usually don’t start with your brand.”
This works when the clip challenges a familiar habit. It creates instant tension without sounding like clickbait.
The problem-identification hook
Name the pain point in blunt terms.
Before: “Let’s talk about editing highlight videos.”
After: “Most highlight videos fail because they start too late.”
This format is practical, especially for service businesses, consultants, and creators teaching a skill. The viewer recognizes the issue and stays for the fix.
The curiosity-gap hook
Reveal enough to create interest, but not enough to resolve it.
Before: “This was a great moment from the interview.”
After: “This answer changed how I cut every interview clip after that.”
Use this when the clip contains a surprising line, a reversal, or a lesson learned under pressure.
Hook writing rules that keep you out of trouble
A hook should do one job. It should earn the next few seconds. That’s it.
Use this checklist:
- Cut all throat-clearing: Remove greetings, intros, and setup language.
- Put the sharpest phrase first: Don’t save the line for later.
- Write for speech, not copy: If it sounds stiff aloud, it won’t land on video.
- Match the clip accurately: Don’t overpromise what the segment can’t deliver.
A useful exercise is rewriting your first line three times before you lock it. Most hooks improve when they get shorter and more direct. If you’re trying to sharpen that skill, this guide on improving storytelling skills↗ is a strong follow-up because hooks work best when they connect to a real narrative arc.
Your opening doesn’t need to explain the whole video. It needs to make leaving feel like a mistake.
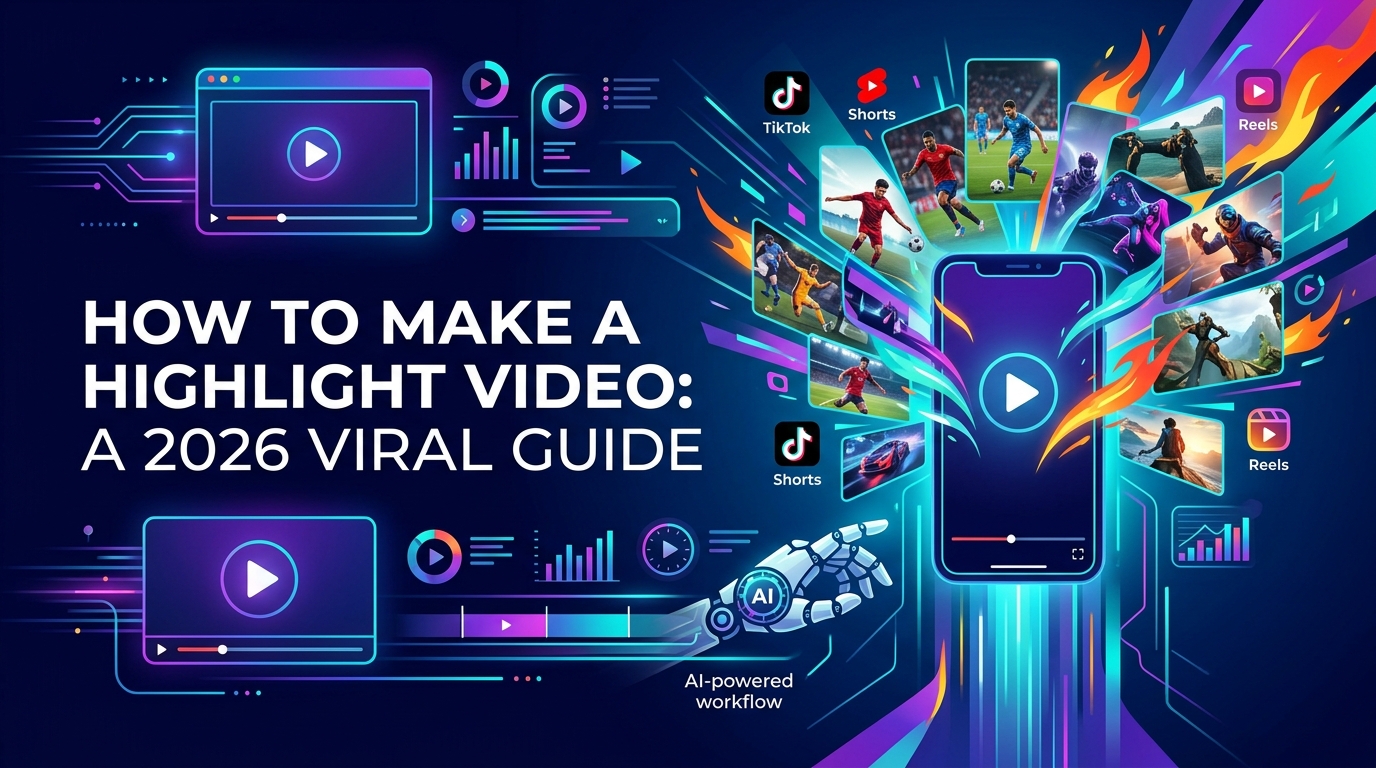
The AI-Powered Workflow for Rapid Video Creation
Manual editing still has a place. It’s useful when the cut needs full creative control or highly custom motion work. But for rapid highlight production, manual-first workflows are the bottleneck.
If you’re turning long-form content into vertical assets consistently, the smarter approach is AI-first. The reason is simple. Discovery, trimming, captioning, reframing, and packaging are repetitive tasks. Repetitive tasks should be automated.
The clearest model is the 4-step AI highlight workflow described by Flowjin↗. It centers on AI moment detection, trimming and punch-up, polishing for mute viewing, and export optimization. Tools using this workflow can find key clips in under 5 minutes, and animated captions can boost watch-time 3x on TikTok.

Step one means finding, not guessing
The old workflow starts with scrubbing. The new workflow starts with signals.
AI moment detection usually works from transcripts, spoken emphasis, topic shifts, and engagement proxies. That matters because it moves the creator out of “watch every minute” mode and into “review the strongest candidates” mode.
That shift is bigger than it sounds. You stop spending most of your time searching.
A practical way to handle this:
- Upload the long-form asset.
- Let the system identify likely high-value moments.
- Review only the shortlisted candidates.
- Keep the ones that can stand alone.
If you’re building a content machine rather than one-off edits, that’s the difference between consistency and burnout. Broader discussions around AI powered content creation↗ make the same point in a wider publishing context. The production advantage isn’t magic. It’s removing repetitive work from the human operator.
Trimming is where most clips get better fast
AI can find moments. It still helps to apply judgment during the trim.
The biggest gains usually come from aggressive cleanup:
- Cut dead air immediately: Remove the first and last pauses.
- Drop redundant setup: If the point lands without the lead-in, cut the lead-in.
- Shorten transitions: Most social clips don’t need gentle ramps.
- Preserve momentum: If the energy peaks early, don’t drag the clip after the payoff.
The strongest short-form highlights feel like they start mid-thought, but in a controlled way. That’s not sloppy editing. That’s respect for the platform.
Vertical framing is not optional
A lot of creators still take a horizontal clip, center-crop it, and call it done. That’s how you end up with tiny faces, cut-off gestures, and dead space.
Good AI workflows handle this with smart cropping and subject tracking. The frame should follow the active speaker or primary action. If it doesn’t, the clip feels repurposed instead of native.
A simple decision rule helps:
| Source situation | Best approach |
|---|---|
| Single speaker | Tight vertical crop with eye-line near the top third |
| Two speakers | Alternate framing or use a layout that preserves reactions |
| Gameplay or sports action | Follow the action path, not the original wide shot center |
| Slides plus speaker | Prioritize the point being discussed, then reinforce with text |
Polish for mute viewing or lose the room
Most creators underestimate how many views happen with low audio attention. Some viewers are muted. Others have sound on but still rely on text because they’re skimming.
That’s why the “polish” phase isn’t decoration. It’s comprehension.
The most impactful additions are:
- Animated captions that track spoken words cleanly
- On-screen headline text that frames the clip’s value
- Progressive emphasis on keywords rather than static subtitle blocks
- Clean hierarchy so text, face, and focal action don’t compete
AI offers another substantial time-saving advantage. Generating captions manually across multiple clips is tedious. Without automation, scaling this process becomes a point of significant delay.
Workflow note: The best AI systems don’t replace editorial judgment. They compress the mechanical parts so you can spend energy on hook quality, sequencing, and positioning.
Export should be built into the same system
A fragmented workflow creates friction. You find moments in one tool, trim in another, caption in a third, export manually, then write post copy from scratch. That setup works for one video. It breaks when you need volume.
A better system keeps clip discovery, editing, packaging, and publishing connected. That’s how creators move from occasional repurposing to reliable output. If you’re thinking in those terms, this piece on automatic content creation systems↗ is useful because it frames content production as an operational process, not a creative sprint every single time.
What works and what usually fails
AI-first doesn’t mean “accept every suggestion.” It means using automation where it is most effective and using judgment where nuance matters.
What works:
- Reviewing shortlisted clips instead of scrubbing full recordings
- Editing for one idea per clip
- Letting captions and reframing happen automatically
- Standardizing templates, then adjusting only what matters
What fails:
- Publishing raw AI picks without checking context
- Leaving clips too long because “more value” feels safer
- Treating captions as an afterthought
- Keeping intros that belong in long-form, not short-form
If you want to know how to make a highlight video fast, this is how. Don’t speed up the old workflow. Replace the parts that shouldn’t be manual anymore.
Adding Polish with AI Voiceover Music and Captions
A highlight clip usually wins or loses in the last 20 percent of the edit.
The core moment may be strong, but weak packaging kills performance fast. Flat narration slows the pace. Generic music muddies the tone. Bad captions force the viewer to work. On TikTok, Shorts, and Reels, that extra effort costs watch time.

AI voiceover should direct attention
Voiceover earns its place when the raw clip needs framing. That includes commentary highlights, faceless explainers, recap formats, and stitched clips where the meaning is not obvious in the first second.
The mistake is over-narration. If the audience can see the punchline, the voiceover should not restate it. It should set up the payoff, sharpen the transition, or add context the original speaker never gave.
In practice, shorter scripts perform better. One tight line with a clear point usually beats a paragraph read in a synthetic voice.
Use AI voiceover for jobs like these:
- Set context fast: Tell the viewer why the clip matters before they swipe.
- Bridge missing logic: Connect two moments that were never meant to sit together.
- Clarify stakes: Add the one missing detail that makes the payoff land.
- Control pacing: Keep dead air out of short clips.
DailyShorts handles this well because it keeps voice generation tied to the edit, captions, and vertical packaging in one workflow. That matters when speed is the goal. Switching between separate tools for script, TTS, and timing burns time and usually creates sync issues.
Music should create momentum, not noise
Music is there to reinforce the clip’s rhythm. It is not there to rescue weak footage.
Choose tracks based on energy and editorial intent. A tense reaction clip needs a different bed than a clean educational breakdown. Then mix conservatively. If speech, captions, and music are all competing, music should lose every time.
A few rules keep this clean:
- Match the track to the emotional direction of the clip.
- Cut around transitions and emphasis points, not every beat.
- Lower the music early under speech.
- Avoid dramatic builds unless the footage earns them.
Creators chasing volume should template this. DailyShorts and similar AI-first tools make that easier by applying repeatable audio logic across batches, which is the smart way to keep output consistent without hand-mixing every short.
Captions do more for retention than most visual effects
Captions are often the difference between a clip that gets understood and one that gets skipped. A lot of short-form views happen with low volume, no headphones, or partial attention. Captions carry meaning in those conditions.
Good captions are edited, not dumped onto the screen. They should guide the eye, support the hook, and stay readable at mobile speed.
What better captions look like
Strong captioning usually follows the same pattern:
- Short lines: Keep phrases compact enough to scan in one glance.
- Intentional emphasis: Highlight the one or two words that carry the point.
- Tight timing: Sync by phrase or beat so the text feels alive.
- Safe placement: Keep text above platform UI and away from the bottom edge.
- Consistent styling: Use one clear visual system instead of changing fonts and colors every clip.
Synthetic narration needs even tighter caption timing because machine voices can feel too even if the text is lazy. For creators using that workflow, this guide on how to do text to speech on TikTok↗ covers the practical setup for making generated speech fit short-form pacing.
A practical polish stack for fast production
The fastest reliable workflow is simple:
- Finalize the cut.
- Add voiceover only where clarity or pacing improves.
- Layer music under the edit and mix for intelligibility.
- Generate and restyle captions after the audio is locked.
- Review the first three seconds with sound on and off.
That last check catches more problems than creators expect. If the clip only works with full audio and perfect attention, it is not packaged for the feed. AI-first production works best when polish is treated as a performance layer, not decoration.
Optimizing Export Settings and Distribution Strategy
A highlight video can be sharp in the editor and still look mediocre after upload. Usually that happens because the export is careless or the publishing workflow is inconsistent.
Export is the technical handoff. Distribution is the strategic handoff. Both matter.

Use a clean baseline export profile
You don’t need exotic settings for vertical social video. You need consistency.
Here’s a practical export baseline for creators publishing across all three major platforms.
| Setting | TikTok | YouTube Shorts | Instagram Reels |
|---|---|---|---|
| Aspect ratio | 9:16 | 9:16 | 9:16 |
| Resolution | 1080 x 1920 | 1080 x 1920 | 1080 x 1920 |
| Format | MP4 | MP4 | MP4 |
| Frame rate | Match source if clean and stable | Match source if clean and stable | Match source if clean and stable |
| Captions safe area | Keep text clear of bottom UI | Keep text clear of title overlays | Keep text clear of bottom controls |
This isn’t about chasing a secret export trick. It’s about avoiding obvious mistakes: wrong crop, soft upscale, caption placement too low, or inconsistent framing. If you need a refresher on vertical composition, this overview of TikTok aspect ratio best practices↗ is worth bookmarking.
Check these before you upload
A simple pre-publish checklist catches most quality issues:
- Watch the first seconds on mobile: That’s where weak framing and bad text placement show up.
- Check caption overlap: Platform interfaces can cover your lower third.
- Confirm the cover frame: Don’t let the thumbnail freeze on a blink or transition.
- Listen once with headphones: Pops, harsh music levels, and awkward cuts stand out fast.
- Trim the ending tight: Dead endings reduce replay likelihood.
Distribution is where many good clips stall
Publishing isn’t just pressing upload. The surrounding packaging affects whether the platform understands the clip and whether the viewer knows why to care.
Your post copy should do one of three things:
- Increase curiosity
- Clarify the takeaway
- Frame the audience relevance
That means better descriptions start with utility or tension, not generic labeling. “Podcast highlight” tells the viewer nothing. A one-line setup that names the problem or insight gives the clip a reason to exist.
Hashtags matter less than creators think, but relevance still matters. Use tags to reinforce the topic, niche, or format. Don’t stuff them. A small set of aligned tags is cleaner than a grab bag of trend-chasing noise.
Publishing rule: If the clip needs a long caption to make sense, the edit probably wasn’t ready.
Repurposing is not copy-paste distribution
A smart distribution strategy adjusts the wrapper around the same core asset.
For example:
| Platform | What to emphasize |
|---|---|
| TikTok | Fast payoff, native-feeling caption copy, direct hook |
| YouTube Shorts | Clear topic framing, searchable wording, immediate value |
| Instagram Reels | Strong visual polish, shareable phrasing, concise context |
You don’t always need a different edit. Often you need different packaging.
Build a repeatable publishing rhythm
The creators who grow from highlights don’t rely on random bursts of motivation. They build a routine:
- Batch source footage or long-form recordings.
- Pull multiple highlight candidates from each source.
- Standardize export settings.
- Prepare post copy and tags in batches.
- Schedule consistently.
That kind of operational discipline matters more than perfection. Good clips published consistently outperform great clips that stay stuck in drafts.
Frequently Asked Questions About Highlight Videos
A creator pulls a great 40-minute recording, clips one decent moment, posts it, and wonders why it stalls. The problem usually is not effort. It is format fit. Highlight videos work when the edit matches the job, whether that job is getting retention on Shorts, proving skill in a recruiting reel, or turning one strong opinion into five testable vertical clips.
How long should a highlight video be
Use the shortest length that delivers a complete payoff.
For TikTok, Shorts, and Reels, that usually means one idea, one reaction, one reveal, or one clean sequence per clip. If the value lands in 18 seconds, cut at 18. Holding extra seconds for context often hurts completion rate more than it helps clarity.
Longer highlight videos still have a place. Recruiting reels, event recaps, and portfolios serve a different viewer. That audience is evaluating consistency and range, not just immediate retention. In those cases, put your best material first and cut anything that does not strengthen the case.
This is one reason an AI-first workflow matters. DailyShorts makes it practical to turn the same source footage into both formats: a tight vertical short for algorithmic distribution and a longer reel for viewers who need broader context.
Can I use copyrighted music in a highlight video
Only if you have the rights or the platform explicitly permits that use case.
Creators run into trouble when they edit once and distribute everywhere. A track that is allowed inside one app’s posting flow may trigger claims once that same video gets reposted to YouTube, used in ads, embedded on a site, or delivered to a client. Cross-platform repurposing breaks fast when the audio rights are unclear.
The safer workflow is simple. Use licensed tracks, platform-approved music, or skip music entirely if the spoken moment is strong enough. Good pacing, clear captions, and a sharp hook carry more weight than a trendy song you may have to remove later.
What should I do if my source footage is messy
Messy footage is normal. Fast creators work with it every week.
The fix is not trying to rescue every second. The fix is choosing a highlight format that can survive imperfect footage. If the framing is weak but the point is strong, build around the line. If the audio is rough, clean it, caption it, and cut harder. If the visual quality drops in sections, crop tighter and keep only the moments with clear emotional or informational payoff.
A practical workflow looks like this:
- Use clips where the spoken takeaway carries the value
- Crop vertically to remove distractions and dead space
- Add captions early so the edit still works on mute
- Pull only the strongest usable moments instead of forcing a full sequence
- Replace weak original audio with AI voiceover when needed
DailyShorts is the smart way to handle this at scale because it speeds up the triage. Instead of manually rebuilding flawed footage from scratch, you can identify the usable moment, generate structure around it, and publish faster.
Should I make one long highlight or several short ones
Several short highlights usually produce better results.
Short-form distribution is a testing game. One source clip can support multiple hooks, different opening frames, and different emotional angles. That gives you more chances to find what gets watch time, rewatches, shares, or comments. It also gives the algorithm more clear shots at classifying your content.
A single long highlight makes sense when the viewer needs a fuller body of work. Recruiting, performance reels, speaker demos, and event summaries fit that model. Even then, the efficient move is usually to cut the long version and then spin out several short vertical clips from the same source.
That is the AI-first advantage. One recording becomes a content batch, not a one-post asset.
If you want the fastest path from idea to finished short-form clip, DailyShorts↗ is the practical place to start. It turns simple prompts into viral-ready vertical videos with script generation, 4K visuals, AI voiceover, smart editing, and automated posting built for TikTok, Shorts, and Reels. If your bottleneck is production speed, consistency, or editing capacity, it removes most of the manual work so you can publish more without building a full video team.
Ready to create viral videos?
Start creating viral TikTok and YouTube Shorts with DailyShorts AI today.